recycled packaging for my etsy shop

I love to shop. Especially online. As a result, I end up with (an embarrassing amount of) used packaging. Thankfully, I had enough foresight to save two years worth of packing material, so when it came time to develop the packaging for my new vintage clothing Etsy shop, The Gibbson Girl, I had lots to work with.

Vintage Recycled Packaging Ideas for Etsy Shops #100daysofmiaprima Vintage Recycled Packaging Ideas for Etsy Shops #100daysofmiaprima

To me, using recycled packaging is an obvious choice: it’s free, I have lots of it, and it’s friendlier to the environment. Instead of spending money creating new branded packaging, I went to my local resale craft store (Pittsburgh Center for Create Reuse) and picked up vintage wall paper and library catalog cards. The result is unique branded packing material with homemade character.

Vintage Recycled Packaging Ideas for Etsy Shops #100daysofmiaprima Vintage Recycled Packaging Ideas for Etsy Shops #100daysofmiaprima

I’m a bit of a perfectionist, so I was hesitant to handwrite my package inserts. But just the other day I received an encouraging compliment: “Library catalog cards! And I love that these are handwritten. They feel…so authentic.” So there you have it. I’m sticking with inexpensive, easy to make, recycled packaging for my Etsy shop!

Tot ziens!

Sarah

This post is #27 of the #The100DayProject. For more updates on my progress, be sure to follow me on Instagram and look for the hashtage, #100DaysofMiaPrima.

Related Posts

Spring Packing + Spring Making

Prepping for the Flea

Vintage Accessories at the Gibbson Girl

How to Clean a Sheepskin Rug

My aunt gave my sister and me this beautiful sheepskin shag run from the 70s when we moved into our new place. It has been sitting in my grandma’s garage…and needless to say, needed a serious bath. Our rug isn’t actually the skin of the sheep, but has the hairs attached to a fiber, so the washing process may be different for your own sheepskin rug. As always, if there are washing directions on your rug, follow those above all else. Ours was lucky enough to have instructions still attached, so I’ll walk you through the process. Dirty and smelly to say the least but worth it for a beautiful addition to our living room!

Sheepskin Rug BeforeBefore

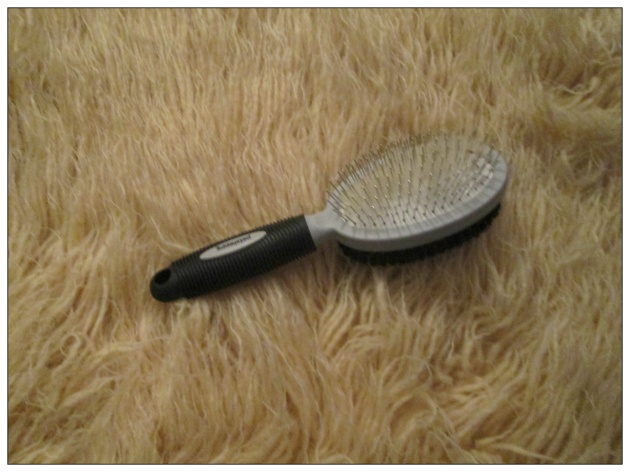
Brush with Dog Brush

1. Brush out the rug with a dog brush. Also gently vacuum (particularly important if the rug has been sitting in a garage for twenty years…).

Brush the Rug

Already looking better!

Wash the rug with baby shampoo2. Wash the rug in lukewarm water in the bath tube. Add a capful of baby shampoo if the rug needs a deeper clean.

3. Rinse off the soap with cold water and let the rug drain in the tub (we waited about an hour).

4. Transfer the rug to a drying rack and lie flat to dry.

5. When completely dry, lay out the rug and brush again.

How to Clean a Sheepskin Rug- After

After.

Looks beautiful and is so soft. It’s a great addition to our living room.

J.crew DIY Denim

JcrewDYIDenim2

JcrewDYIDenim

J.crew has some unique DIY denim styling ideas, including my favorite: DIY patchwork monogram and patch-pocket fading. I’m up for giving the patchwork monogram a try one of these days, but in case you aren’t so inclined to spend time on these looks, here are some great store-bought alternatives. View all of J.crew’s DIY denim ideas here.

AE Colorblock Denim

Colorblock Denim Wester Top, now $39.99 at American Eagle Outfitters.

il_570xN.428688915_me0i

90s Denim and Gingham Top, $30 at vauxvintage on Etsy.

Lined Zip Clutch Tutorial

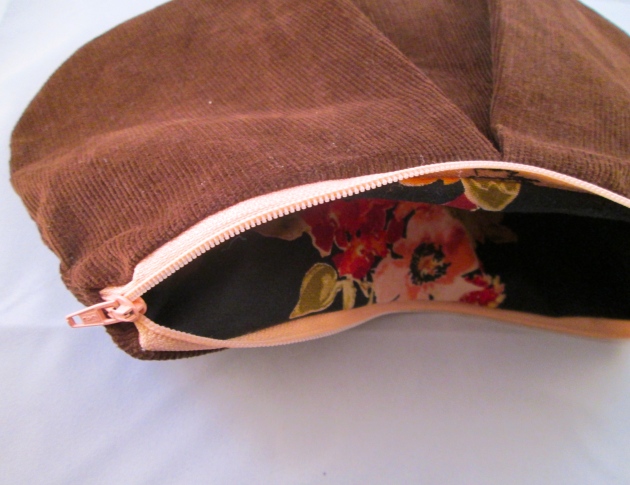
I found the pattern and tutorial for this charming little clutch at Charm Stitch. I modified the original pattern by increasing the pattern size by two inches and choosing not to decorate my bag with drawings (I let the corduroy and contrasting vintage floral lining do all the talking).

I don’t recommend this project for beginners who have not worked with zippers yet, but if you feel up to the challenge, I suggest trying a sample bag first before working on your final piece.

Zip Clutch Tutorial- miaprimacasa.wordpress.com Zip Clutch Tutorial- miaprimacasa.wordpress.com Zip Clutch Tutorial- miaprimacasa.wordpress.com

My biggest piece of advice is to be patient, use a zipper foot, and backstitch wherever it makes sense for security (I’d like think this bag will get thrown around and used quite a bit!).

Have you tried the tutorial out yourself? Pass along your thoughts or suggestions below!

Ciao,

Sarah

Related Posts

Lined Sequin Clutch with Zipper: a tutorial at Sweet-Verbena.blogspot.com

Fold-Over Clutch Tutorial at Fabandmade.blogspot.com

DIY: Leather Fold Over Clutch at SayYestoHoboken.com

Before & After: “Open” Dresser

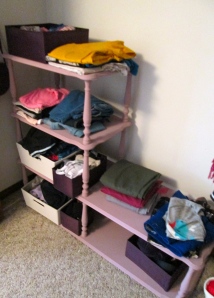
My aunt and uncle were kind enough to provide a whole bunch of used furniture for my new apartment. Most of it fit well into the place, but this piece below was a little trickier. We didn’t have enough space in the living room and certainly not in our tiny kitchen. As a result, it ended up as shelving in the garage. I also happened to be missing a dresser and considered thrifting around for one until I realized that this piece could be the perfect dresser. I painted it a mauve-lavendar and bought cloth containers to act as drawers. The result is a versatile “open” dresser that matches my intended room decor and cost me far less than anything else I was considering to buy.

Before

After

Total cost of this project?

Shelving unit: Free

Paint: $12

Total Cost: $12

Ciao!

Sarah

College or Sorority T-Shirt Blanket Quilt

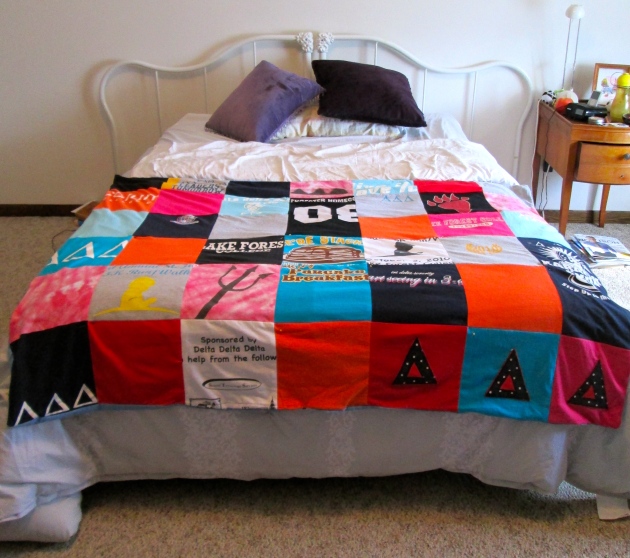
After graduating college, I was left with more college and sorority t-shirts that I could ever want to wear. I didn’t want to throw them out, however. Afterall, they reminded me of some great memories that I hoped never to forget. But I didn’t really want to drag my twenty-some t-shirts to my new apartment, so instead, I chose to create a quilt from the old shirts. As a novice sewer, it took me longer than excepted to finish, but the work was worth it! Now I have a comfy blanket that holds so many memories from my college days, livens up my new apartment, and is much more useful than a stack of worn out shirts. Below are steps to creating your own t-shirt blanket.
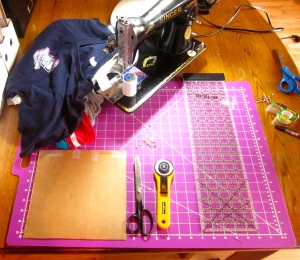
What you need:

18+ T-shirts

Sewing Machine

Thread

Cardboard (cut into 9″ by 9″ square)

Rotary cutter

Cutting mat

Straight edge

Scissors (one pair for fabric, one pair for the cardboard)

Pins
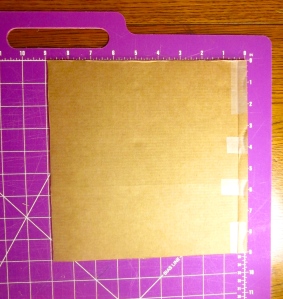
Cut the cardboard into a 9 inch by 9 inch square. This will serve as your template for the fabric squares.

Cut down the sides of your t-shirt and lay flat on the cutting board.
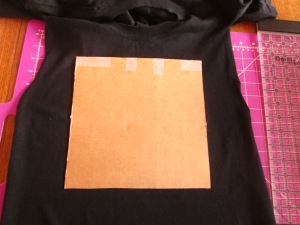
Place cardboard square over t-shirt and carefully use rotary cutter to cut fabric. Use the straight edge to guide your cutting.
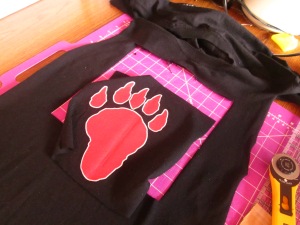
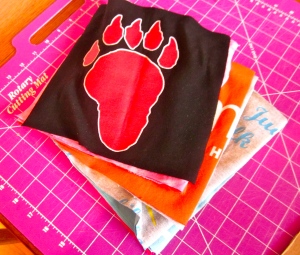
Continue for all your t-shirts. I first cut out the graphic on the shirt and then cut as many squares of the solid color from the t-shirts as I could. I wanted as many squares to work with so that I could put together the most desired combination.
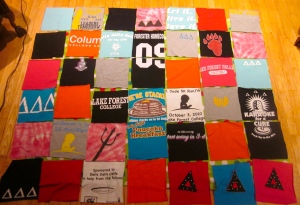
I then laid out the squares on the floor in order to get clear picture of what my blanket would look like. I chose to use 36 squares total (6 squares by 6 squares). However, I recommend laying out your quilt 6 squares across and five squares high. With 36 squares, I had trouble finding fabric that was wide enough to be a backing piece. I ended up having to cut off half of the top row of squares in order to back my quilt with two panels of solid fabric.
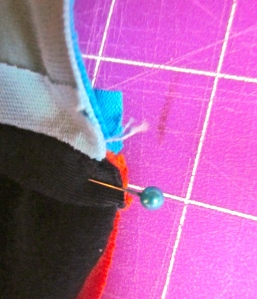
Next, pin one row of squares together to begin sewing. Once you have sewn all your row, you can sew your columns. Make sure that you line up your seams as perfectly as possible, so that your squares are even and tight.
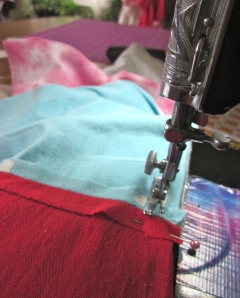
I then sewed on my back panel fabric. I found inexpensive fabric at Savers, so I had to cut it into two panels in order to fit my quilt properly. I recommend using a cotton or cotton blend for the backing. I considered fleece, which is a good option if you want a very warm blanket, but I opted out because I want my blanket to function as more of an everyday throw.
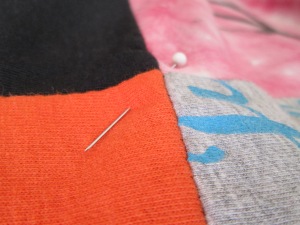
Finally, I pinned every other corner then sewed a few stitches. Doing this will keep the squares from shifting in the wash.
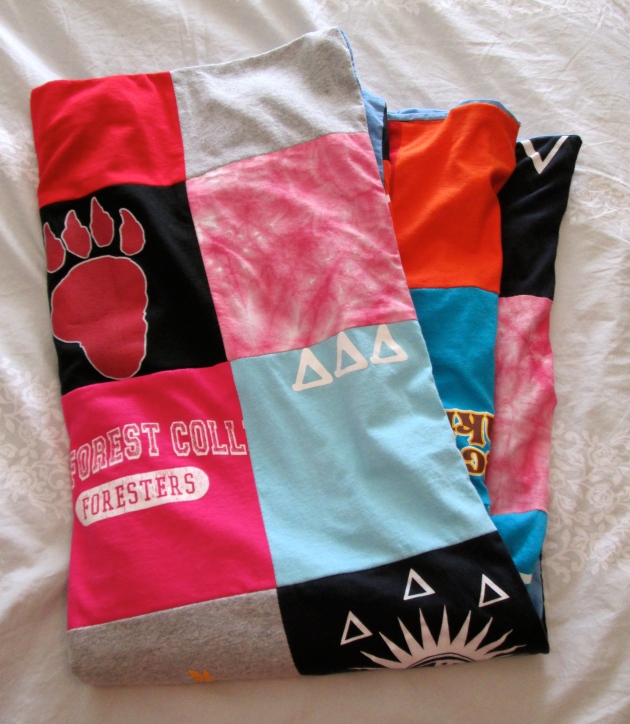
Voila! Your t-shirt quilt is done and ready to serve as a memorable and functional piece for many years. Beats keeping a stack of old shirts around!

Some final recommendations:

If your machine has zig-zag stitch, use this as the t-shirts are knits and will tend to stretch. I used a very old Singer that did not have zig-zag, so I may be faced with some shifting in the future.

Any extra squares would make great, soft pillows.

Good luck!

Sarah

Creating Beautiful Framed Art on a Budget


You would be suprised how much something is elevated by framing it. A mat and a simple frame can make a piece of art  (or something else entirely) into a beautiful and affordable way to decorate a space. There are three main objects that make beautiful wall decor when framed:

1. Artwork. I am artist so this one is pretty easy for me. For one project, I found a matted poster frame at Ikea and framed a conte crayon drawing I drew in Florence. Matting it really transformed and elevated the work. I also collect artwork from street and art fairs around the world. When I travelled to Europe, I bought a painting (usually quite cheap from a local artist on the street) in every city I stayed in for more than three days. I did the same upon returning to the States but chose to purchase prints instead of originals as originals tend to be more expensive here. It was a fun way to collect memories and also a fun way to decorate my home.

2. Postcards. I also collected postcards from Europe, particularly postcards of my favorite artwork from galleries and museums. The postcards were usually less than a dollar and I found cheap matted and unmatted frames at GoodWill to frame them with. Framing the postcards, especially the art postcards, was an easy and affordable way to introduce some beautiful art to my space.

3. Sheet music books. My mom found a few old sheet music books from a garage sale, and they manged to fall into my hands and end up in my apartment. They were so easy to frame because they came in a standard frame size. I chose to use a matted frame because the edges of the sheets were worn slightly. The mat hid the wear and made the sheet (and the stunning art on it) really stand out. The results were fun, retro art pieces that added interest and needed ivory coloring to my living room.

What is your favorite decorating idea?

Ciao!

Sarah

My Living Room: Before & After

One Month Ago

I’ve been putting most of my decorating efforts into my living room. I spend much of my time there or in the kitchen, and (given my lack of dining room) I plan on using the space for most of my entertaining. As a result, after only a month and a half, my living room has already gone through a transformation.

I framed a whole lot of art, bought new curtains, add splashes of much needed ivories through cushions and flowers, and finally bought light bulbs for my lamps (you’d be surprised how much that changes the atmosphere of a place!).

Today

My future plans include painting my coffee table neon green (seriously, trust me on this), creating some more art for the space, and adding more bright colors through painted jars (DIY project courtesy of Pinterest, of course).

Any suggestions on the space?

Ciao!

Sarah

Jewelry Organizer Idea: Inspiration Bulletin Board

I knew I wanted a bulletin board over my vanity/desk. I liked the idea of fashionable images that will help inspire my morning wardrobe choices. I also knew that my jewelry didn’t belong on my vanity (that is way too cluttery for my taste!). My sister came up with the idea of hanging necklaces and bracelets from tacks at the base of the bulletin board. The idea is simple, but I think the result is striking (not to mention extremely cheap).

The cost for this project?

Bulletin board: $4 at GoodWill

Images: Free from fashion magazines

Tacks: $3 at Target

Total cost: $7

What are some good jewelry organizer ideas you’ve ran across?

Ciao!

Sarah

No-Sew Pillow Covers

I ran across this project on Pinterest, and I figured it was worth a try given 1) I currently don’t own a sewing machine and 2) even if I did, I’d probably never get around to actually sewing. The two pillows I covered took only about twenty minutes and look pretty gorgeous! See the original DIY post here.

The cost for this project?

Pillows: free (took them from my parents’ home)

Fabric: 5 Euros at a Florentine market

Total: about $6.50

Do you know of any other creative ways to cover pillows on a budget?

Ciao!

Sarah