I Want to Make Stuff

And that’s exactly what I’m going to do. I’m dedicating this weekend to only four main things: go on a 12 mile run, explore a new local brewery, go to church, and CRAFT. The crafting is going to be part spring cleaning, part sewing/painting/building, and it’s about time I got to it! There is a whole list of projects I’ve been meaning to do, and now I’m finally going to make time for them.

I’m sharing this with you all not just for your reading pleasure…but also because I hope you all hold me accountable. I better come out of this weekend with some great photos of my finished projects to share with you all!

Here’s the plan (more or less):

   DIY Weekend Projects miaprimacasa.com

Pillow Covers

DIY Weekend Projects miaprimacasa.com

Painted Glass Jars/Wine Bottles

DIY Weekend Projects miaprimacasa.com

Repurpose Old Candle Jars

DIY Weekend Projects miaprimacasa.com

Hairpin Leg Coffee Table

^Now that’s quite an ambitious weekend!

Wish me luck!

Cheers,

Sarah

My New Kitchen! How to Modernize an Outdated Space

My New Kitchen: How to Modernize an Outdated Space

For about six months, my sister and I attempted to decorate our new apartment around the free furniture we had received from family. At some point, we realized that we wanted to take our decorating to a more sophisticated level, i.e. not a clearly twenty-something pad filled with hand-me-down furniture. The kitchen space was the most troubling for us thanks to the outdated flooring, cabinetry, and trim. Our solution? A large rug that set off our eating space from our cooking space, a modern table (Ikea), pops of red (sleek Target chairs and three red candles did the trick), and a Matisse print. We focused our color pallet on just three maine colors: black, red, and blue to make the space look clean and modern. The transformation clearly works, since I’ve found myself cooking more and spending more time in the kitchen than I had before!

My New Kitchen: How to Modernize an Outdated Space My New Kitchen: How to Modernize an Outdated Space

Total Cost: $298.98

Chairs- $79.99 for a set of two at Target

Table- $179.0 at Ikea

Rug- $79.99 at Target

Coat Rack- $29.99 at Ikea

Red votive candles- $10 at Target

What are your suggestions for modernizing an outdated space?

Ciao!

Sarah

4 Unique & Easy Ways to Style a Classic Oxford Shirt

I ran across this post by Refinery 29 and loved the concept of unique outfits based on one classic shirt. However, I didn’t feel like going out and spending money on these looks, as great as they were. Instead, I decided to create four unique looks based on a classic white Oxford shirt…using only items from my closet. All outfits are appropriate for my work place (which is admittedly very casual). It’s a fresh way to approach my closet without spending more money. I can’t wait to try them out!


Before & After: “Open” Dresser

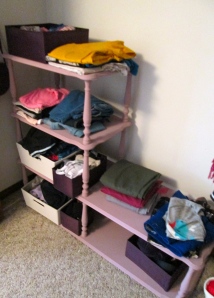
My aunt and uncle were kind enough to provide a whole bunch of used furniture for my new apartment. Most of it fit well into the place, but this piece below was a little trickier. We didn’t have enough space in the living room and certainly not in our tiny kitchen. As a result, it ended up as shelving in the garage. I also happened to be missing a dresser and considered thrifting around for one until I realized that this piece could be the perfect dresser. I painted it a mauve-lavendar and bought cloth containers to act as drawers. The result is a versatile “open” dresser that matches my intended room decor and cost me far less than anything else I was considering to buy.

Before

After

Total cost of this project?

Shelving unit: Free

Paint: $12

Total Cost: $12

Ciao!

Sarah

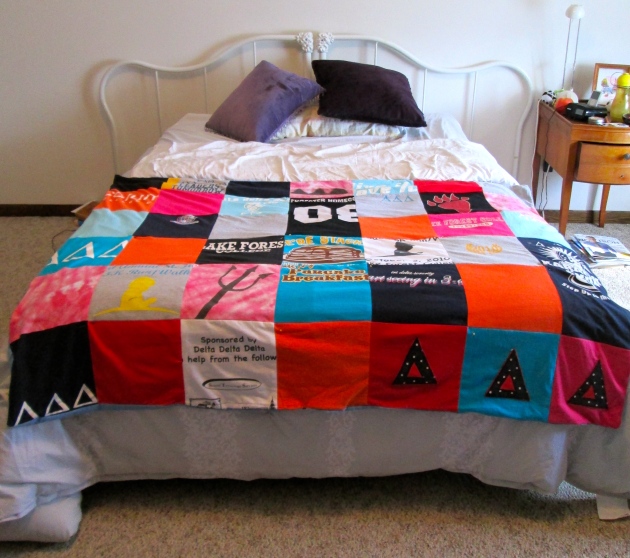
College or Sorority T-Shirt Blanket Quilt

After graduating college, I was left with more college and sorority t-shirts that I could ever want to wear. I didn’t want to throw them out, however. Afterall, they reminded me of some great memories that I hoped never to forget. But I didn’t really want to drag my twenty-some t-shirts to my new apartment, so instead, I chose to create a quilt from the old shirts. As a novice sewer, it took me longer than excepted to finish, but the work was worth it! Now I have a comfy blanket that holds so many memories from my college days, livens up my new apartment, and is much more useful than a stack of worn out shirts. Below are steps to creating your own t-shirt blanket.
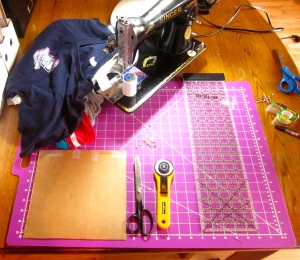
What you need:

18+ T-shirts

Sewing Machine

Thread

Cardboard (cut into 9″ by 9″ square)

Rotary cutter

Cutting mat

Straight edge

Scissors (one pair for fabric, one pair for the cardboard)

Pins
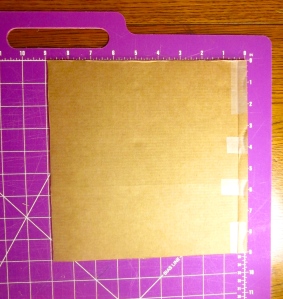
Cut the cardboard into a 9 inch by 9 inch square. This will serve as your template for the fabric squares.

Cut down the sides of your t-shirt and lay flat on the cutting board.
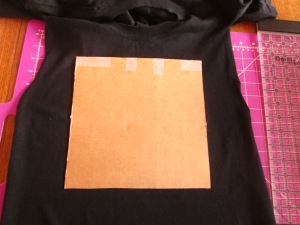
Place cardboard square over t-shirt and carefully use rotary cutter to cut fabric. Use the straight edge to guide your cutting.
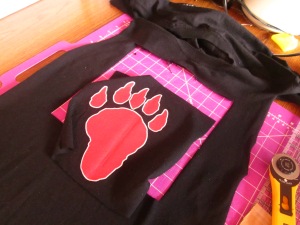
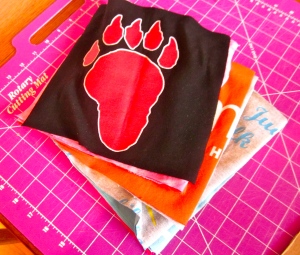
Continue for all your t-shirts. I first cut out the graphic on the shirt and then cut as many squares of the solid color from the t-shirts as I could. I wanted as many squares to work with so that I could put together the most desired combination.
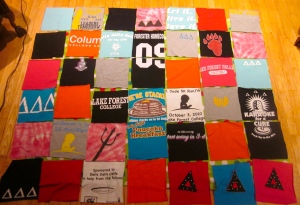
I then laid out the squares on the floor in order to get clear picture of what my blanket would look like. I chose to use 36 squares total (6 squares by 6 squares). However, I recommend laying out your quilt 6 squares across and five squares high. With 36 squares, I had trouble finding fabric that was wide enough to be a backing piece. I ended up having to cut off half of the top row of squares in order to back my quilt with two panels of solid fabric.
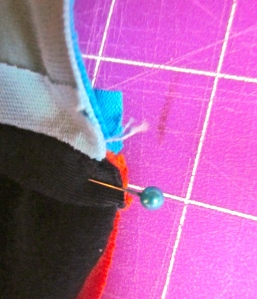
Next, pin one row of squares together to begin sewing. Once you have sewn all your row, you can sew your columns. Make sure that you line up your seams as perfectly as possible, so that your squares are even and tight.
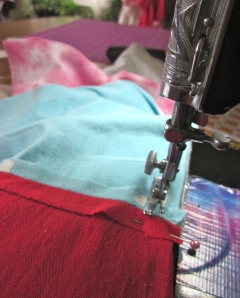
I then sewed on my back panel fabric. I found inexpensive fabric at Savers, so I had to cut it into two panels in order to fit my quilt properly. I recommend using a cotton or cotton blend for the backing. I considered fleece, which is a good option if you want a very warm blanket, but I opted out because I want my blanket to function as more of an everyday throw.
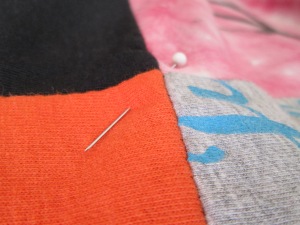
Finally, I pinned every other corner then sewed a few stitches. Doing this will keep the squares from shifting in the wash.
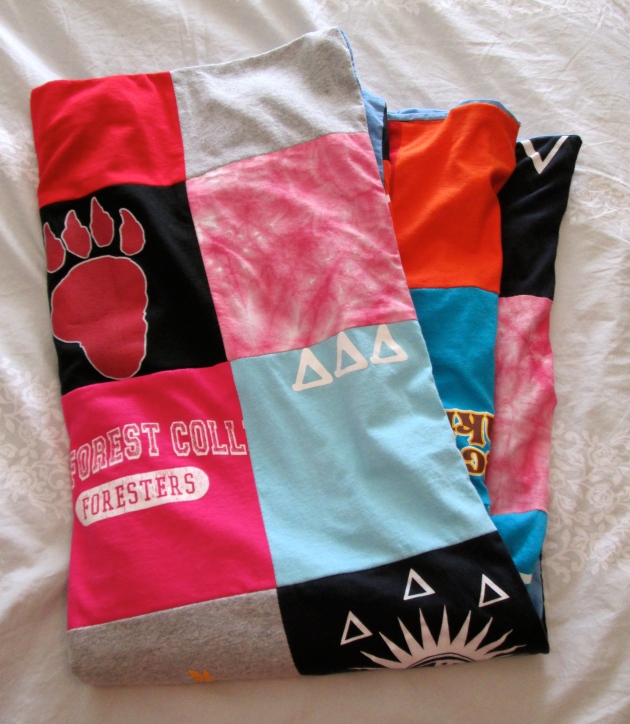
Voila! Your t-shirt quilt is done and ready to serve as a memorable and functional piece for many years. Beats keeping a stack of old shirts around!

Some final recommendations:

If your machine has zig-zag stitch, use this as the t-shirts are knits and will tend to stretch. I used a very old Singer that did not have zig-zag, so I may be faced with some shifting in the future.

Any extra squares would make great, soft pillows.

Good luck!

Sarah

Quick and Delicious Tuna Melt Sandwich

As well as moving into my first place, I’ve also started my first job, and already I’m finding that cooking anything besides a frozen pizza is difficult. So I’ve decided to try out some easy, quick recipes and post the best ones here. I’m focusing on dishes that takes less than ten minutes to prepare and use food that I normally have around. My first dish was an easy chicken parmesan.

What you need:

Two cans of tuna

One large spoonful of cottage cheese

Lemon juice from half a lemon

One large spoonful of mayo

One teaspoon of Dijon mustard

One stalk of celery, chopped

5-6 cherry tomatoes, chopped

Green onions, chopped

Salt and pepper to taste

Four slices of rye bread

2 thins slices of dill havarti

Prep (5 minutes to prepare, 3 minutes to cook):

Mix the above ingredients together then spread onto the rye bread and top with the havarti. I grilled mine panini-style in my George Foreman, but you could also broil them open-faced in your oven.

It’s a super easy and delicious spin on a traditional tuna melt!

Creating Beautiful Framed Art on a Budget


You would be suprised how much something is elevated by framing it. A mat and a simple frame can make a piece of art  (or something else entirely) into a beautiful and affordable way to decorate a space. There are three main objects that make beautiful wall decor when framed:

1. Artwork. I am artist so this one is pretty easy for me. For one project, I found a matted poster frame at Ikea and framed a conte crayon drawing I drew in Florence. Matting it really transformed and elevated the work. I also collect artwork from street and art fairs around the world. When I travelled to Europe, I bought a painting (usually quite cheap from a local artist on the street) in every city I stayed in for more than three days. I did the same upon returning to the States but chose to purchase prints instead of originals as originals tend to be more expensive here. It was a fun way to collect memories and also a fun way to decorate my home.

2. Postcards. I also collected postcards from Europe, particularly postcards of my favorite artwork from galleries and museums. The postcards were usually less than a dollar and I found cheap matted and unmatted frames at GoodWill to frame them with. Framing the postcards, especially the art postcards, was an easy and affordable way to introduce some beautiful art to my space.

3. Sheet music books. My mom found a few old sheet music books from a garage sale, and they manged to fall into my hands and end up in my apartment. They were so easy to frame because they came in a standard frame size. I chose to use a matted frame because the edges of the sheets were worn slightly. The mat hid the wear and made the sheet (and the stunning art on it) really stand out. The results were fun, retro art pieces that added interest and needed ivory coloring to my living room.

What is your favorite decorating idea?

Ciao!

Sarah

My Living Room: Before & After

One Month Ago

I’ve been putting most of my decorating efforts into my living room. I spend much of my time there or in the kitchen, and (given my lack of dining room) I plan on using the space for most of my entertaining. As a result, after only a month and a half, my living room has already gone through a transformation.

I framed a whole lot of art, bought new curtains, add splashes of much needed ivories through cushions and flowers, and finally bought light bulbs for my lamps (you’d be surprised how much that changes the atmosphere of a place!).

Today

My future plans include painting my coffee table neon green (seriously, trust me on this), creating some more art for the space, and adding more bright colors through painted jars (DIY project courtesy of Pinterest, of course).

Any suggestions on the space?

Ciao!

Sarah

5 Fall Trends That I Can’t Wait For

If you haven’t noticed already, clothing brands have been launching their fall collections this past week. I’ve already noticed a few great fall trends that I am excited to buy (I will try my best to wait until September!). I also figure it’s a good idea for me to have an understanding what I want to buy before I actually go out there  and shop, since I do have to consider my budget. These trends are currently top of my list, and I will spend the next couple of months searching for some great deals on them.

1. Colored Tights

A great variation on summer’s colored denim, colored tights will be a great way to keep the bright colors of last season alive through autumn.

$9.90 from Nordstrom

2. Venetian or Smoking Shoes

These shoes are a comfortable alternative to a heel and a unique spin on a flat. Not to mention that they can easily be dressed up or down.

$49.95 from GAP

3. Oversized Coats

They are finally available to the masses! I first fell in love with Mary Margaret’s oversized coat in the first season of Once Upon a Time.

4. Leather

I always consider leather, particularly leather jackets and bags, a staple for fall, but this season, leather is becoming even more popular (and look out for hybrid leather-fabric designs too).

$99.90 from Steve Madden at Nordstrom

5. Printed Dress Pants

I saw plenty of printed denim and leggings this spring, but I am really excited to see the prints taken up a notch in classy dress pants.

$110 from J.Crew

What fall trend are you most excited for?

Ciao!

Sarah

Great Finds: Vintage Patterns & 1970s Vogue Sewing Book

I ran across these unique vintage patterns at two different antique shops in Wisconsin. I’m going to attempt to sew using the patterns, but if I have no luck, I’ll be glad to use them as decoration in my bedroom. Sew, Mama, Sew! has some useful tips about sewing from vintage patterns. One of them happens to be buy an “old school sewing book.” Thankfully, I picked up a 1970s (my era of choice for patterns incidentally) copy of The Vogue Sewing Book of Fitting Adjustments & Alternations at Good Will.

Total Cost?

$7.50 for the vintage patterns

$3 for the Vogue sewing book

______

$10.50 (plus whatever I end up spending fabric–don’t worry, I’ll keep you updated!)

Have you ever tried to sew using vintage patterns?

Ciao!

Sarah